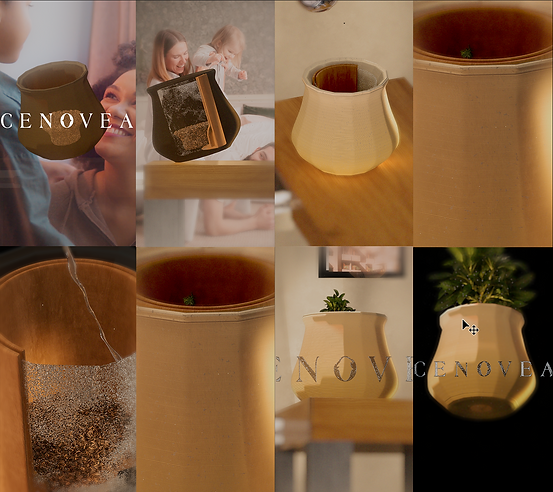
CENOVEA

The Story
This project involved creating Cenovea, a fictional luxury ceramics brand, to demonstrate my skills in branding and visual storytelling.
Using a varied workflow of Comfy UI, ElevenLabs Voice Generation, Cinema 4D and After Effects.
The core idea: Ceramics that embody an opulent fusion of form and function. Each piece is envisioned as emerging from the earth, shaped by a blend of traditional mastery and modern innovation – creating functional art designed to endure.
Welcome to a revelation in ceramic artistry. Here, within the heart of our conceptual studio, Cenovea, each creation transcends mere objecthood to become a living testament. It is more than fired clay; it is a narrative whispered in form, a tangible piece of a story that connects the earth, the artisan, and you.
Think of the genesis of a diamond, brought to impossible brilliance under immense pressure and the slow passage of time. Similarly, our ceramics emerge from the humble, grounding presence of the earth itself. Raw clay, imbued with potential, is carefully coaxed and meticulously shaped. This transformation is not accidental; it is guided by a profound understanding, a delicate and deliberate balance struck between the enduring wisdom of time-honored tradition and the exciting pulse of fearless innovation.


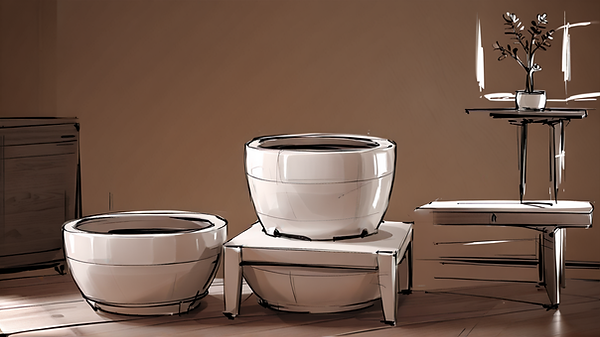
Storyboards & Style Frames
The story expresses the the Cenovea planter self-watering technology, with the planter spinning on a table, which can be included into many different family lifestyles. We can see inside of the planter and how to simply water and refill the planter.

Process
Visually, the biggest challenge was making the the multiple layers, the solution I found was to split the render into four layers: the background, the table, the inner and outer planter. This way of rendering allowed me to render the background and table faster and only once, and if I needed to adjust something in the animation, I didn't need to recalculate the whole scene. Rendering on layers also helped at the compositing stage when I needed to add shadow and some graphics in front and behind. The visual language needed to be faithful to the complex mechanisms at work with the planters self-watering feature, while balancing design and planting best practices.


Cinema 4D Workflow
I began working on the planter and using Xpresso, a node system within Cinema 4D, to link duplicated elements on the rig. My primary focus was animating the glass, with the liquid following the internal walls. Implementing some programming significantly saves time by automating tasks that would otherwise require manual animation. To address a specific issue, I utilised a stack of circles connected by a Loft Generator, allowing me to control the radius and height of each part independently. This approach also facilitated art-directing the animation, enabling one section to morph after another or incorporating secondary animations seamlessly.


Behind the Scenes
What Would I Have Had to Do Without This Stable Diffusion AI - Workflow?


Ever wondered how these unique, cinematic potters for plants came to life? If I hadn’t used this AI-powered workflow, here’s what the process would have looked like:
First, I’d start with a rough sketch—probably with pencil and paper, or maybe a digital drawing tablet if I was feeling fancy. But to get from a simple doodle to a polished, eye-catching design? That would mean hours (or days!) of refining, redrawing, and experimenting with different shapes, styles, and details. Every time I wanted to try a new idea—like changing the time of day, the mood, or even the setting—I’d have to redraw everything from scratch.
If I wanted to add multiple elements or characters (imagine a potter shaped like a knight and a gnome, or a whimsical castle), I’d need to carefully plan out each part, making sure the proportions and style matched. Keeping everything consistent across different designs? That’s a whole new challenge—especially if I wanted to create a whole collection of matching potters.
And let’s not forget about color! Achieving a cohesive look across all my designs would mean lots of trial and error, mixing paints or tweaking digital palettes, and hoping everything turned out just right.
Finally, to get that “final render” look—the kind of image that feels like it belongs in a storybook or a movie scene—I’d need advanced illustration skills, expensive software, and a lot of patience. Every little change or variation would mean going back to the drawing board.
But with this Comyfy UI/Stable Diffusion storyboard workflow, all of that changes.
"Where Nature Meets Design"
With the first 3D animation, the goal was to explore the story behind our potters. How do they interact with their environment? What kind of atmosphere do they create? This animation delves into the imaginative spaces where our potters reside, perhaps nestled in a abstract space, or becoming a focal point in an interior. It’s about illustrating the the feeling the brand aims to inspire – a harmonious blend of nature, design, and a touch of everyday magic.
"A Potter's Journey"
This piece was all about capturing the intricate details and the serene presence of our potters. Imagine watching light play across their textured surfaces, seeing the subtle curves and unique forms from every angle, almost as if you could reach out and touch them. I wanted to convey the craftsmanship and the quiet beauty that each potter holds, showcasing how they seamlessly blend with and elevate the plant life they cradle. It’s a meditative journey, inviting you to appreciate the artistry and the potential for growth within each piece.
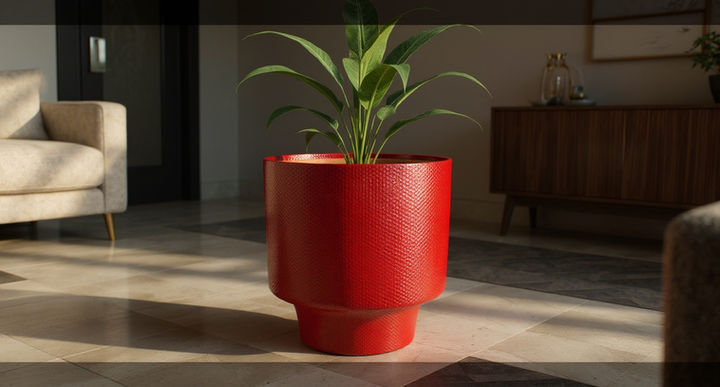
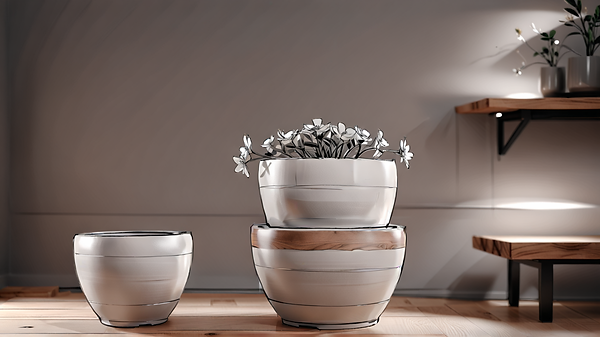
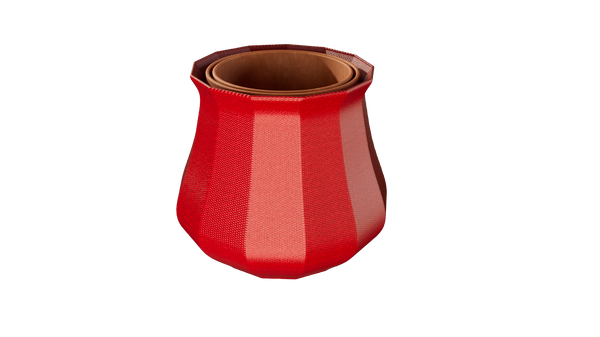
Case study: Luxury lifestyle visuals from a single 3D render
Overview
I transformed a single Cinema 4D product render into a suite of photoreal lifestyle visuals and hero shots tailored for premium brands. Starting with a high‑fidelity 3D render of a red floor plant potter, I built a repeatable workflow that places the product in modern, chic interiors without reshoots—delivering campaign‑ready imagery in hours instead of weeks.
Goals
-
Elevate a core product render into on‑brand marketing assets
-
Maintain exact product geometry, color, and material fidelity
-
Showcase the product in authentic domestic contexts (no handholding, full‑height floor potter)
-
Achieve a luxury aesthetic aligned with houses like Chanel, Louis Vuitton, Hermès


Workflow
Input asset
-
Source: Cinema 4D 3D render (alpha background, high resolution)
-
Prep: Minor cleanup, confirm PBR details, preserve specular highlights and surface texture
Scene direction
-
Define lifestyle scenarios: living room, kitchen/dining, entryway, home office
-
Specify set design: materials, lighting mood, prop styling, color palette
-
Lock constraints: full object visible, correct scale (~45–60 cm), grounded contact shadows
Compositing and generation
-
Use image‑conditioned generation and photoreal compositing to place the exact product into interiors
-
Match camera perspective, focal length, and lighting direction to keep reflections and shadows consistent
-
Calibrate depth of field and colour grading for a refined, editorial finish
Quality control
-
Check scale in environment against reference furnishings
-
Verify edge fidelity (no truncation), clean contact shadows, and accurate reflections
-
Ensure brand‑appropriate mood: quiet luxury, modern minimalism, tactile materials
Delivery
-
Multiple 16:9 options ready for web hero sections, banners, paid social, and deck placements
-
Consistent look system so future scenes can be generated with the same visual language

Why this approach works
-
Speed to market: Turn one 3D render into a full set of lifestyle images
-
Visual consistency: Centralized art direction across scenes and channels
-
Production value: Boutique‑level lighting and styling without location logistics
-
Flexibility: Rapid iteration on rooms, plants, and props while preserving product accuracy